
07 Apr 2019 – Update – nanoDLP now natively supports the Nextion (In Beta at the moment, but the beta runs nice and stable). Accordingly, the procedure has been updated
I am in the process of rebuilding my Wanhao D7, which includes dumping the Wanhao logic board and replacing it with a Raspberry Pi, putting a 4.3 inch Nextion touchscreen in the front panel and replacing the utterly useless UV light source with a full size array.
This post deals with the first two items.
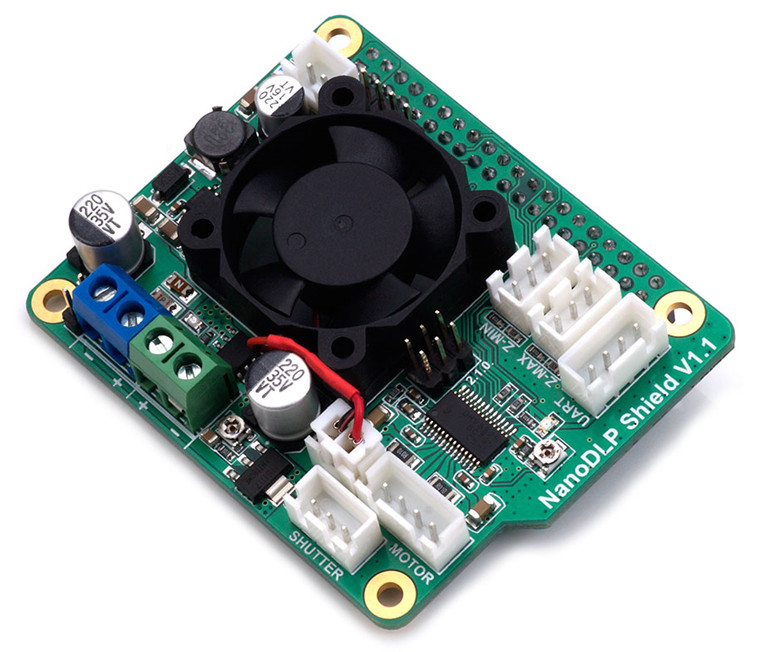
I got myself a Fysetc nanoDLP shield (v.1.), which seems pretty cool and well designed. Unfortunately, it’s not all that well documented, so I’ve gone through the pain of getting it running, and documented it here, so you don’t have to.
A few notes:
• These instructions are for a Raspberry Pi 3 Model B. They may not work for other models
• The shield provides power to the Raspberry Pi. You do not have to apply power separately to the Pi
• When setting the motor reference voltage, measure between ground and the potentiometer wiper.
• For some applications (Like replacing the Wanhao D7 mainboard), you will need to reverse the motor direction
• Right at the end of all of this, I had to update nanoDLP again from the browser as per step 2.4 in order to get the Z motor to work
1. Prepare the Shield
Setting the correct reference voltage for current limiting is absolutely essential, as the entire system will shut down if the current limit is set too high. This is a major cause of people giving up on these shields early on in the game
1.1. The shield uses a DRV8825 stepper driver. Conventional wisdom out on the web suggests using the following formula to get the correct current limiting:
VREF = Current/2
However, for these shields, that formula is INCORRECT! The reason for this is simple; The standard Pololu style drivers using these chips usually use 0.1 Ohm sense resisters. However, these shields use 0.01 Ohm sense resisters, so the correct formula is:
VREF = Current/20
2. Install and update nanoDLP
2.1. Install nanoDLP on an SD card, following the instructions on the nanoDLP website
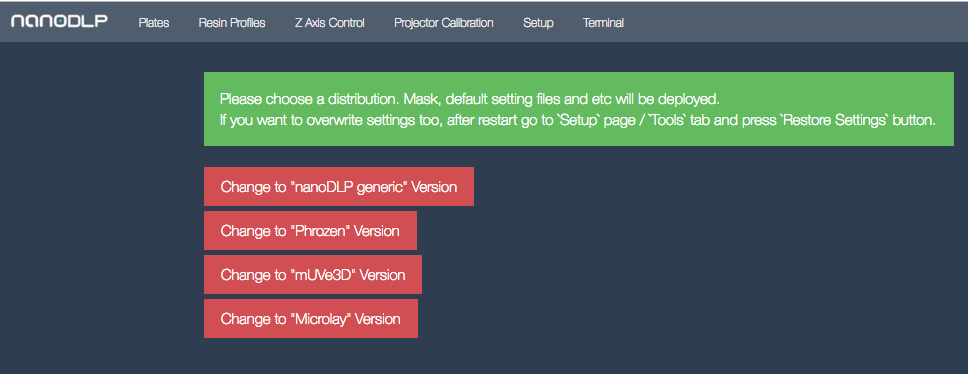
2.2. Insert it in the Pi and power it. After a while you should be able to get the webpage up. It shouldn’t matter what distribution you choose as we will load a machine profile later, but just for simplicity choose the nanoDLP generic version. The Pi will reboot
2.3. Once it has rebooted, click on the Setup then Tools tabs. Click on the Expand Filesystem button. The Pi will reboot. This will take a while and it depends on the size of your SD card
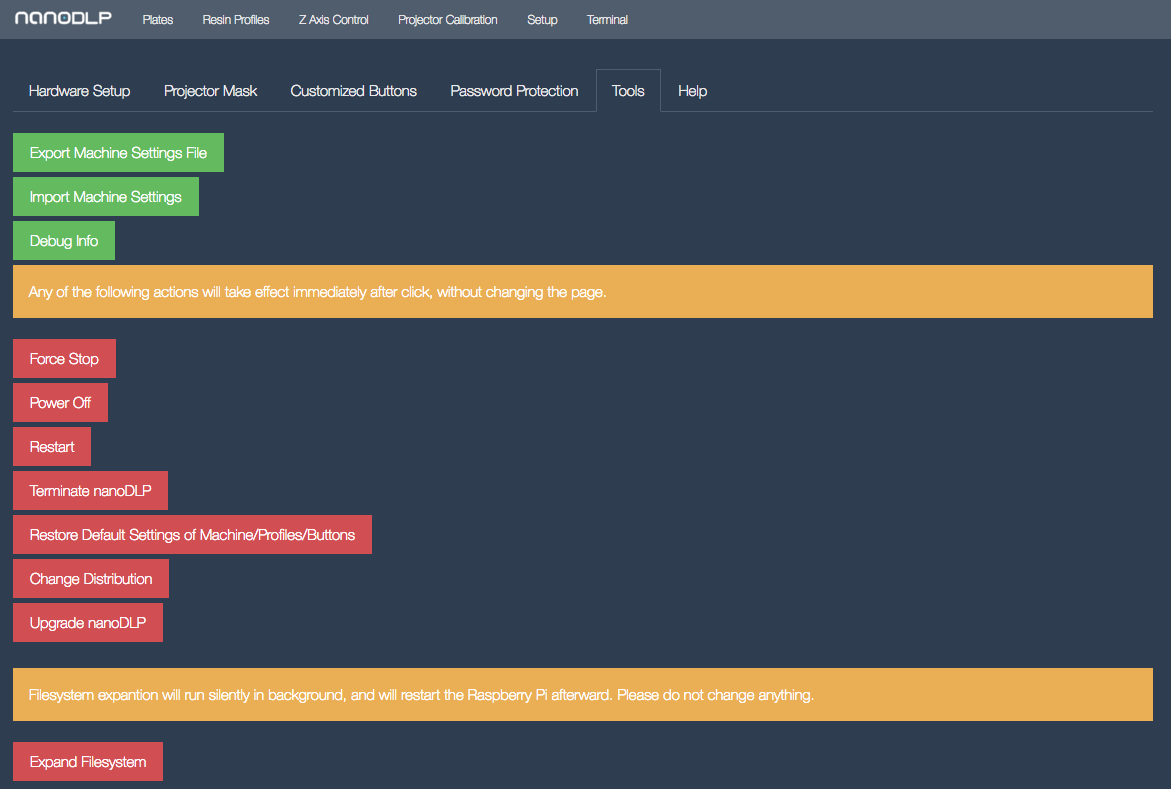
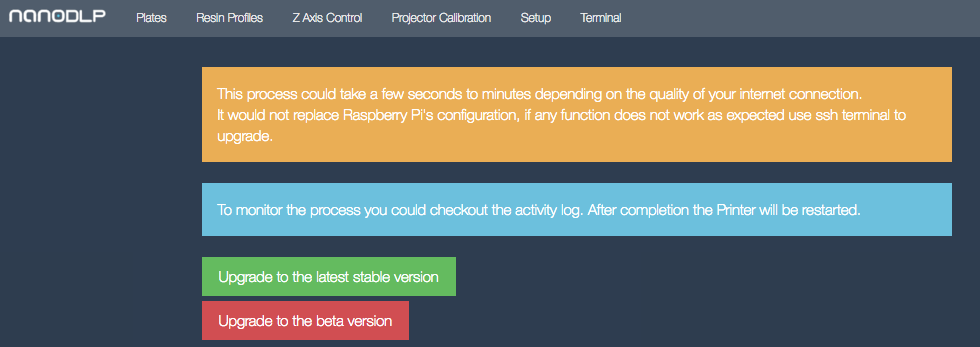
2.4. Once it has rebooted, click on the Setup then Tools tabs again. Click on the Upgrade nanoDLP button. in the new page, click on the “Upgrade to latest beta version” button. After a while, the Pi will reboot
2.5. By default, the shield turns on the UV lamp on power up, and only turns it off once nanoDLP has booted and taken control. There is now a possibility to turn it off by setting the relevant GPIO to an output and driving it low at boot time. This usually requires a firmware update as the nanoDLP firmware does not have this facility.
SSH onto the Pi
Check the firmware:
pi@raspberrypi:~ $ sudo /opt/vc/bin/vcgencmd version

Mar 16 2018 16:21:29

Copyright (c) 2012 Broadcom

version db815f3ae3dc88cf21fed2765f3b25d9d2bea67a (clean) (release)

pi@raspberrypi:~ $
We can see from this particular output that the build date is 16/03/2018 (I use the correct format for a date, DD/MM/YYYY, not the stupid American one). If the build date is earlier than 21/03/18, update it:
pi@raspberrypi:~ $ sudo rpi-update

*** Raspberry Pi firmware updater by Hexxeh, enhanced by AndrewS and Dom

*** Performing self-update

*** Relaunching after update

*** Raspberry Pi firmware updater by Hexxeh, enhanced by AndrewS and Dom

#############################################################

This update bumps to rpi-4.14.y linux tree

Be aware there could be compatibility issues with some drivers

Discussion here:

https://www.raspberrypi.org/forums/viewtopic.php?f=29&t=197689

##############################################################

*** Downloading specific firmware revision (this will take a few minutes)

% Total    % Received % Xferd  Average Speed   Time    Time     Time  Current

Dload  Upload   Total   Spent    Left  Speed

100   168    0   168    0     0     25      0 --:--:--  0:00:06 --:--:--    42

100 56.2M  100 56.2M    0     0  1213k      0  0:00:47  0:00:47 --:--:-- 2105k

*** Updating firmware

*** Updating kernel modules

*** depmod 4.14.97-v7+

*** depmod 4.14.97+

*** Updating VideoCore libraries

*** Using HardFP libraries

*** Updating SDK

*** Running ldconfig

*** Storing current firmware revision

*** Deleting downloaded files

*** Syncing changes to disk

*** If no errors appeared, your firmware was successfully updated to 883750dcbdfb4be32d6bc579258a07c9f664ea77

*** A reboot is needed to activate the new firmware

pi@raspberrypi:~ $
Reboot the Pi:
pi@raspberrypi:~ $ sudo reboot
2.6. Update the OS – SSH into the Pi and run the following commands:
pi@raspberrypi:~ $ sudo unlink /etc/dhcpcd.conf

pi@raspberrypi:~ $ sudo cp /boot/nanodlp-dhcp.txt /etc/dhcpcd.conf

pi@raspberrypi:~ $ sudo apt-get update

pi@raspberrypi:~ $ sudo apt-get upgrade

pi@raspberrypi:~ $ sudo ln -s /boot/nanodlp-dhcp.txt /etc/dhcpd.conf
Reboot the Pi:
pi@raspberrypi:~ $ sudo reboot
3. Prepare the boot config for HDMI, GPIO and Nextion.
Note that the HDMI section is for a 2k LCD panel – you will have to change it to suit your particular panel
3.1. Edit /boot/config.txt and add the following to the end of the file
# Additions for NanoDLP Shield v1.1 and Nextion
# Set up the GPIO that controls the UV array as
# an output and drive it low as soon as possible
# after power up.
# This gets around the default shield behaviour
# of turning on the array and leaving it on until
# NanoDLP is loaded.
# *** Requires firmware with a build date of 21/03/18 or later ***
gpio=5=op,dl
# Addition for Nextion screen
dtoverlay=pi3-disable-bt
# CAMERA SETTINGS ( 1 = ON, 0 = OFF)
#start_x=1
disable_camera_led=1
# DISPLAY SETTINGS
display_rotate=0x10000
hdmi_force_hotplug=1
hdmi_timings=1440 0 50 10 35 2560 0 4 2 2 0 0 0 50 0 198000000 0
hdmi_group=2
hdmi_mode=87
hdmi_pixel_freq_limit=500000000
hvs_priority=0x32ff
max_framebuffer_width=1440
max_framebuffer_height=2560
framebuffer_width=1440
framebuffer_height=2560
framebuffer_depth=24
framebuffer_ignore_alpha=1
config_hdmi_boost=4
gpu_mem=192
Reboot the Pi:
pi@raspberrypi:~ $ sudo reboot
You will notice that the blue LED next to the power terminals goes out on reboot. This is a good thing, it means that UV output is turned OFF.
3.2. Set up the serial interface and localisation
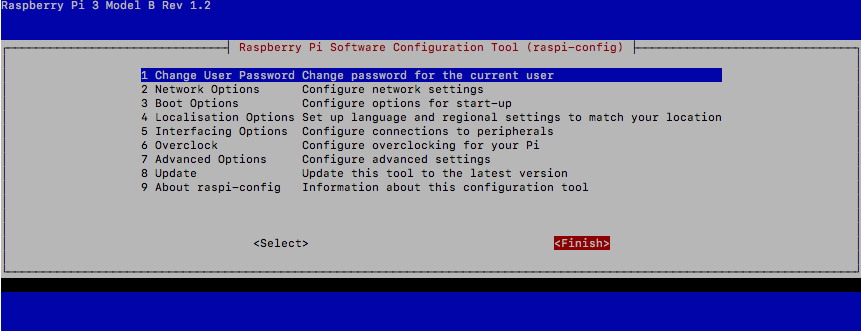
pi@raspberrypi:~ $ sudo raspi-config
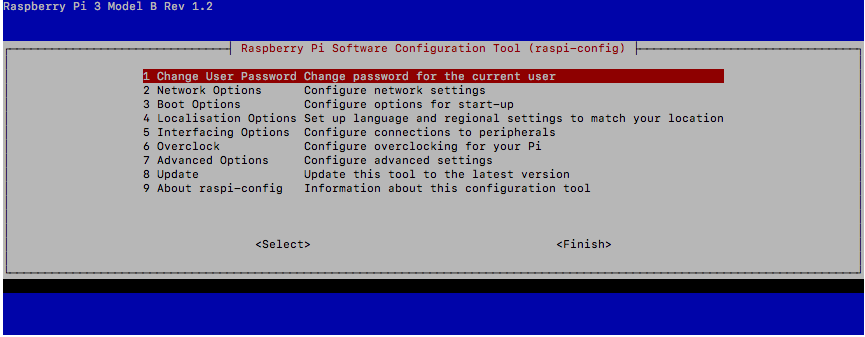
Scroll down to “Localisation Options” and hit enter
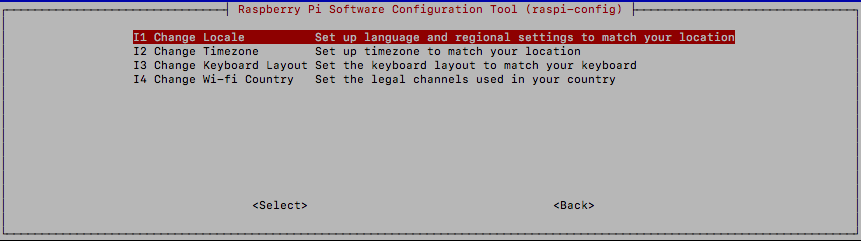
When done, hit the Tab key to get to the bottom row and the right arrow key to select back.
When back in the main config screen, scroll down to “Interfacing Options” and hit enter
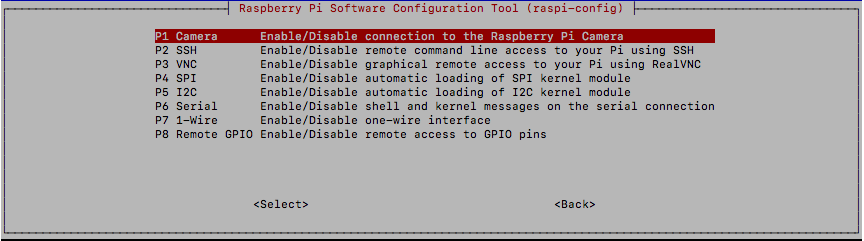
Scroll down to “Serial” and hit enter. Select “No” for the first question:

Select “Yes” for the second question:
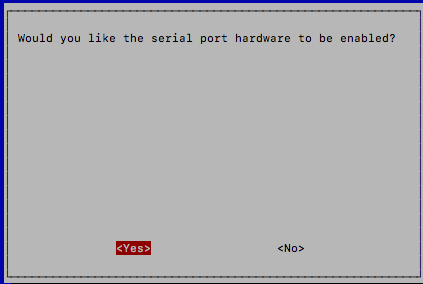
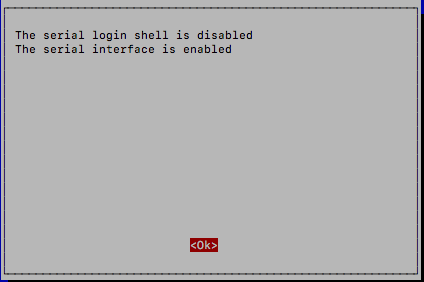
Hit enter when presented with the selection feedback screen:
Use the Tab key to access the bottom selections, select “Finish” and hit enter.
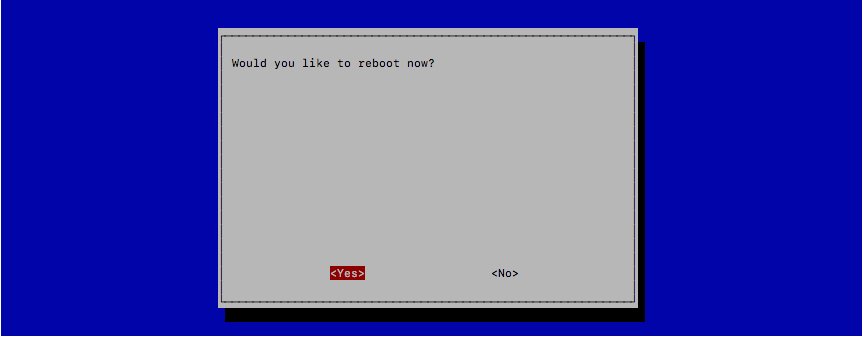
Hit enter to reboot:
3.3. Disable Bluetooth:
pi@raspberrypi:~ $ sudo systemctl disable hciuart
Reboot the Pi:
pi@raspberrypi:~ $ sudo reboot
3.4. Disable the console:
Edit /boot/cmdline.txt. It will look something like this
dwc_otg.lpm_enable=0 console=tty1 root=PARTUUID=b94f2c65-02 rootfstype=ext4 elevator=deadline fsck.repair=yes rootwait
remove any console entries, so that it becomes similar to this:
dwc_otg.lpm_enable=0 root=PARTUUID=b94f2c65-02 rootfstype=ext4 elevator=deadline fsck.repair=yes rootwait
Reboot the Pi:
pi@raspberrypi:~ $ sudo reboot
3.5. Update the firmware on the Nextion screen – Download the correct TFT file from the nanoDLP Download page for your screen, copy it to an SD card, insert the SD card in the SD card reader of the screen (NOT the Raspberry Pi) and power on the screen. Updating will take just a few seconds, and the screen will tell you when it’s done.
4. Set up nanoDLP to use the shield and Nextion
Connect to nanoDLP using your web browser. Click “Setup” and select “Machine Settings”
4.1. Printer Settings

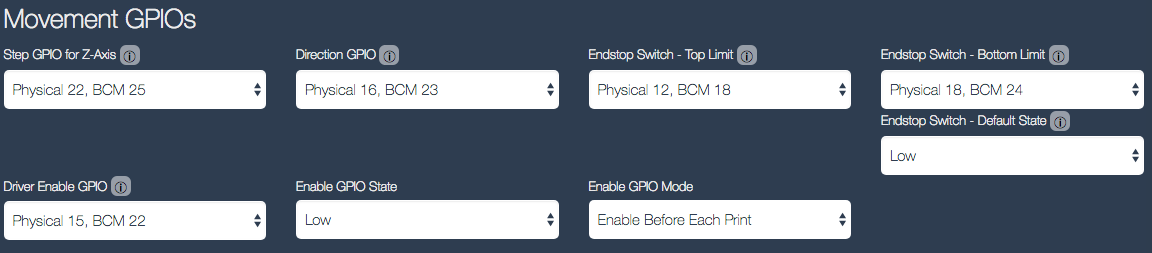
4.2. Movement GPIOs
4.3. 3D Printer Board
Don’t bother setting anything here. Enabling GPIOs in the step above disables this section
4.4. Codes
You will need to add codes specific to your printer here. I can’t tell you what they will be
4.5. Shutter

4.6. Display
You will need to add entries specific to your screen here. I can’t tell you what they will be. In order to save all of the settings you make in this section, you must at least set XY resolution
4.7. Platform/Resin
You will need to add entries specific to your screen here. I can’t tell you what they will be.
4.8. Motor
You will need to add entries specific to your screen here. I can’t tell you what they will be.
4.9. Camera Module
Leave as is
4.10. AMLCD
Leave as is
4.11. Physical Buttons
Leave as is
4.12. Hardware Fault Detection

4.13. Various Settings
If you are using a remote instance of nanDLP to slice, set the IP address and port. Set the Nextion port address.
Don’t forget to hit the Submit button